Flutter has many built-in widgets for building UI, including complex ones, but when it comes to using native features, we must either write native-level code or rely on third-party plugins. Thankfully, the Flutter community is highly active and most of the common use cases are developed by Flutter itself as add-on plugins. We will see how one such plugin, called local_auth, can be used to implement biometric authentication in Flutter.
As with all Flutter plugins, we begin by adding the local_auth plugin from pub.dev
flutter pub add local_auth
Since the plugin needs access to device specific features like fingerprint sensor data and camera (for facial recognition), we will have to add some settings in the native code, which is quite straightforward and explained well in the documentation. Specifically, the following changes would be required for iOS and Android:
For iOS:
Add the NSFaceIDUsageDescription key with the appropriate reason as to why you would require in the Info.plist file as follows:
<key>NSFaceIDUsageDescription</key>

<string>Why is my app authenticating using face id?</string>
Note that this is only required if you plan to use the Face ID feature of iOS, if not, you can simply skip this.
For Android:
In Android you will have to add the permission to access fingerprint data in the AndroidManifest.xml file as follows:
<manifest xmlns:android="http://schemas.android.com/apk/res/android"
package="com.example.app">
  <uses-permission android:name="android.permission.USE_FINGERPRINT"/>
<manifest>
Apart from this you will need to add some code to the MainActivity.kt file in the Android source code as shown below:
import io.flutter.embedding.android.FlutterFragmentActivity
import io.flutter.embedding.engine.FlutterEngine
import io.flutter.plugins.GeneratedPluginRegistrant

class MainActivity: FlutterFragmentActivity() {
    override fun configureFlutterEngine(flutterEngine: FlutterEngine) {
        GeneratedPluginRegistrant.registerWith(flutterEngine)
    }
}
Now we can start building a simple app that will use biometrics to login a user with their biometric data.
We will start by creating a basic Flutter app using the Flutter create command and implement two screens.
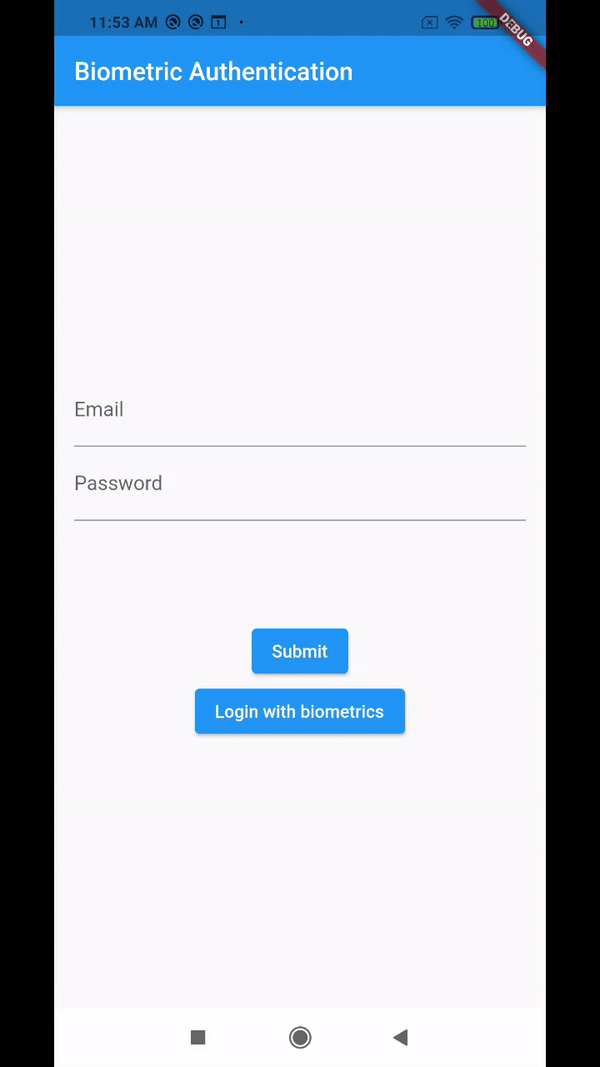
The first one will be our home screen, which is basically a login page that simulates a login using a hardcoded email and password. We will also add another button to login using biometrics on the login screen.
import 'package:biometric_authentication/success_page.dart';
import 'package:flutter/material.dart';
import 'package:local_auth/local_auth.dart';
import 'package:shared_preferences/shared_preferences.dart';

class LoginPage extends StatefulWidget {
  LoginPage();
  @override
  _LoginPageState createState() => _LoginPageState();
}

class _LoginPageState extends State < LoginPage > {
    final _emailController = TextEditingController();
    final _passwordController = TextEditingController();
    bool isAuthenticating = false;
    @override
    Widget build(BuildContext context) {
      return Scaffold(
          appBar: AppBar(
            title: Text('Biometric Authentication'),
          ),

          body: Stack(
            children: [
              Padding(
                padding: EdgeInsets.all(16),
                child: Column(
                  mainAxisAlignment: MainAxisAlignment.center,
                  children: [
                    TextField(
                      decoration: InputDecoration(labelText: 'Email'),
                      controller: _emailController,
                    ),

                    TextField(
                      obscureText: true,
                      decoration: InputDecoration(labelText: 'Password'),
                      controller: _passwordController,
                    ),

                    SizedBox(
                      height: MediaQuery.of(context).size.height * 0.1,
                    ),

                    ElevatedButton(
                      child: Text('Submit'),
                      onPressed: () async {
                        final result = await logIn(_emailController.value.text,
                          _passwordController.value.text);
                        setState(() {
                          isAuthenticating = false;
                        });

                        if (result) {
                          Navigator.pushReplacement(
                            context,
                            MaterialPageRoute(builder: (context) => SuccessPage()),
                          );
                        } else {
                          ScaffoldMessenger.of(context).showSnackBar(
                            SnackBar(content: Text('Invalid username/password')));
                        }
                      },
                    ),
                    if (isAuthenticating)
                      Container(
                        color: Colors.black.withOpacity(0.5),
                        child: Center(
                          child: CircularProgressIndicator(),
                        ),
                      )
                  ],
                ),
              );
            }

            Future < bool > logIn(String email, String password) {
              FocusScope.of(context).unfocus();
              setState(() {
                isAuthenticating = true;
              });

              return Future.delayed(Duration(seconds: 2), () async {
                if (email != '[email protected]') {
                  return false;
                }

                if (password != "password") {
                  return false;
                }

                final sharedPreferences = await SharedPreferences.getInstance();
                sharedPreferences.setString('email', email);
                sharedPreferences.setString('password', password);
                return true;
              });
            }
          }
This should complete our initial screen. The second screen is just a success page where the user can logout.
import 'package:biometric_authentication/login_page.dart';
import 'package:flutter/material.dart';
import 'package:shared_preferences/shared_preferences.dart';

class SuccessPage extends StatelessWidget {
  @override
  Widget build(BuildContext context) {
    return Scaffold(
      appBar: AppBar(title: Text('Success!')),
      body: Padding(
        padding: EdgeInsets.all(16),
        child: Center(
          child: Column(
            children: [
              Text('Logged In!'),
              ElevatedButton(
                child: Text('Log out'),
                onPressed: () {
                  Navigator.pushReplacement(context,
                    MaterialPageRoute(builder: (context) => LoginPage()));
                },
              ),
            ],
          ),
        ),
      ),
    );
  }
}
When the user logs in successfully they will be directed to a success screen and if not, we will show an error message using a snack bar. Note that in the login method we use the shared_preferences plugin also provided by the Flutter team to store the user’s credentials. This will be used later to log in using biometrics. For real-world applications, we would not be doing this and would use something such as the user’s token after authentication, but this will suffice for demonstration.
Basically, we wire up biometrics here in such a way that if the user logs in once manually, then they should be able to login using their biometrics the next time. We do this by retrieving the credentials of the user stored in the shared preferences and then use that to login if the biometric authentication is successful. This is where the local_auth plugin will come into play. We will first initialize an instance of the LocalAuthentication class provided by the plugin.
final localAuth = LocalAuthentication();
Then we will use the plugin to authenticate the user’s biometrics. Here we use the authenticate method available in the instance where we enforce the use of biometrics by setting the biometrics-only parameter to true and provide a reason as to why we need the user’s biometrics.
localAuth.authenticate(
      localizedReason: 'Please verify to login without credentials',
      biometricOnly: true,
    );
This would be the baseline implementation for using biometrics in the app. Now we just need to write a function where we use this logic to authenticate the user with biometrics and then use the stored credentials to login to the application. This can be done as shown below:
Future < bool > loginWithBiometrics() async {
  setState(() {
    isAuthenticating = true;
  });
  final result = await localAuth.authenticate(localizedReason: 'Please verify to login without credentials', biometricOnly: true, );
  if (result) {
    final sharedPreferences = await SharedPreferences.getInstance();
    final email = sharedPreferences.getString('email');
    final password = sharedPreferences.getString('password');
    if (email == null || password == null) {
      return false;
    }
    return logIn(email, password);
  }
  return false;
}
We will now use this function by creating another button on the page to login using biometrics.
ElevatedButton(
  child: Text('Login with biometrics'),
  onPressed: () async {
    final result = await loginWithBiometrics();
    setState(() {
      isAuthenticating = false;
    });

    if (result) {
      Navigator.pushReplacement(
        context,
        MaterialPageRoute(builder: (context) => SuccessPage()),
      );
    } else {
      ScaffoldMessenger.of(context).showSnackBar(SnackBar(
        content: Text(
          'Failed to login with biometrics. Please login manually.')));
    }
  },
);
This should work for our basic application. But what if there are no credentials stored in the first place? Then what would the button do? Ideally, we would be showing the button only if there are any credentials stored, which can be done during build or with a FutureBuilder. For now, we just show a generic message prompting the user to login manually.
Additionally, we could add another button on our success screen to reset the credentials which would remove the stored local credentials to simulate the credentials being removed or the token being expired.
ElevatedButton(
  child: Text('Reset local credentials'),
  style: ElevatedButton.styleFrom(
    primary: Colors.red,
  ),

  onPressed: () async {
    final sharedPreferences = await SharedPreferences.getInstance();
    sharedPreferences.remove('email');
    sharedPreferences.remove('password');
    ScaffoldMessenger.of(context)
      .showSnackBar(SnackBar(content: Text('Credentials Reset')));
  },
);
This should wrap up our demo application. Our final app should look like this:
Conclusion
We have seen how we can interact with device level features such as fingerprint or face id for biometric authentication using plugins available in Flutter. Apart from that you can also see how you could use the same to integrate with your authentication flow.
For real world applications however, it would be better not to store your credentials on the device and rather use something like the authentication token from your authentication service or use something a bit more secure for storing instead of shared_preferences, such as the flutter_secure_storage plugin which exposes the encrypted storage of Android (KeyStore) and iOS (KeyChain).